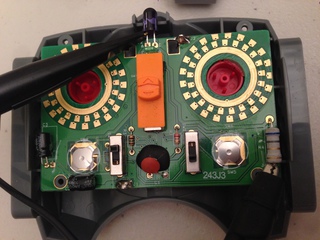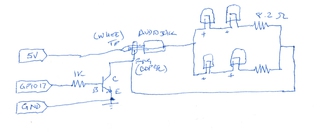
But I wanted to know what my controller (8879 LEGO Power Functions IR Speed Remote Control) was actually sending. So I hooked it up to a scope.
It's a little hard to read, but you can see the 0 bits are shorter than the 1 bits. This picture is the first row of the table below.
I decoded:
| Right STOP button | 1000 0101 1000 1010 |
Brake then float, Output 1 |
| Left STOP button | 1000 0100 1000 1011 |
Brake then float, Output 0 |
| Right CW (clockwise) | 0000 0111 0101 1101 |
Decrement PWM, Output 1 |
| Right CCW (counter-clockwise) | 1000 0111 0100 0100 |
Increment PWM, Output 1 |

Originally I wrote code to use /sys/class/gpio, and it worked, but was not very reliable. Because user mode code can be interrupted by lots of things going on in the OS, pulses and pauses were often too long. To fix this, you need to disable interrupts, and to do that you need a kernel mode driver. LIRC already had one, so it made sense to use it.
I also looked at using wiringPi, but it has the same timing problem as /sys/class/gpio since it also runs in user mode.
This code runs from http in cgi-bin, so parameters come from the QUERY_STRING environment variable. This complicates the code a little.
Another complication is the toggle bit needs to change for every command sent so multiple "increase speed" commands can be sent for redundancy, but the train only increases speed once. The computer science way to handle this is with a counting semaphore, which is what this code does.
I was disappointed to learn the 8878 LEGO Power Functions Rechargeable Battery Box has a 2 hour auto-shutoff. This means the power will likely be off when I want to run the train remotely. The 88000 LEGO Power Functions AAA Battery Box auto-shutoff can be disabled (by holding down the power button), but AAA batteries don't last very long (they discharge when you look at them).
So I needed another solution. I bought two LiPo (Lithium Ion Polymer) batteries and chargers from adafruit.com and wired them up in series using an 8886 LEGO Power Functions Extension Wire.
LiPo batteries are delicate and you must be careful to not overcharge or over discharge them or they could fail or catch fire. So I was careful to buy batteries with built-in overcharge/discharge protection. Most LiPo batteries for radio control toys do not have built-in protection so I couldn't use them.
Here is version 2 which includes two charger boards wired in series.
This worked, but since the train was switched on all the time, the battery died too fast. It only lasted a few days, and I would have to open up the train and charge the battery. And most of the time it wasn't being used.
So I added a LightBlue Bean Bluetooth Low Energy module to control the power and report the battery level. This uses node.js, noble and bean-writer to control the Bean from Raspberry Pi. Whenever the control page is loaded or a button is pressed, battery power is turned on for 5 minutes.
I considered changing everything to a 9V layout, but this has a few disadvantages:
http://aron.ws/projects/lirc_rpi/ Aron Szabo wrote the LIRC driver for an IR LED connected to Raspberry Pi GPIO.
http://visualgdb.com/tutorials/raspberry/LED/ uses /sys/class/gpio to control a GPIO LED.
http://elinux.org/RPi_Low-level_peripherals covers all the different ways to access hardware and how fast they are.
http://wiringpi.com/ looks like another great way to control GPIO's.